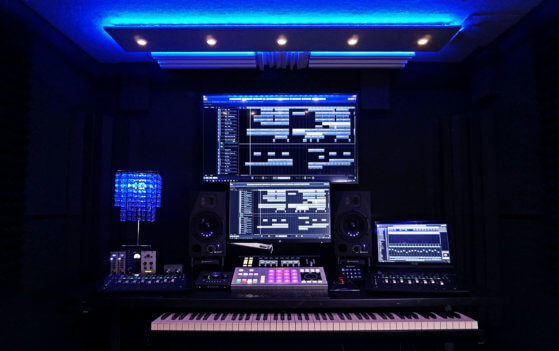
If you’re serious about recording your own music, then a well-designed studio is one of the most vital investments you can ever make. Poorly designed studios with poor acoustics or lousy engineering skills can ruin an otherwise good performance, while audiophile-grade facilities (combined with solid knowledge) will help to give your songs that extra “pop” and shine.
It’s for this reason that many famous songwriters and singers like Phil Collins and Dolly Parton have invested in their very own studios. They know the cost of a well-made studio, in the long run, outweighs the cost of renting for a half-hour session here and there.
While the studio you choose might be a big investment, you will more than makeup for it with the amount of work that goes into it. Would you rather spend $300 on your studio purchase or $300 a month in monthly studio expenses?
Many new clients ask about this crucial question. As a recording artist myself, I am always pleased to share my knowledge and experience on the subject. Considering that professional studios are usually around $100,000 to $150,000 to build (more if you want all of their amenities), you can see why these questions come up.
If you can’t afford a major studio, then try to build one yourself. With the many books and magazines out there on acoustics, you’ll be able to design your own. If you’d rather invest the money elsewhere in your career, then find yourself a good home studio with a reputable engineer. (This can take some searching, so patience is required.)
Poor Acoustics Can Ruin Your Song
Many of us naturally think of things we want in our studio: Neve preamps, vintage tube microphones, etc. However, before we spend our money on such equipment, let’s make sure that the room is up to snuff first.
First of all, are you recording in a basement or garage? These typical DIY spots, no matter how well you insulate them, can wreak havoc on your recordings. The reverb alone is enough to give your songs an amateurish sound.
The same goes for rooms that vary wildly in volume. Rooms with low ceilings and hard walls will create “pumpy” sounding recordings, while rooms with high ceilings and wood floors will sound hollow and bright. You’ll probably need to do some acoustical treatment on the inside if you want to record at home. (If you’re unsure how to do this, then check out the Acoustical Treatment section of the FAQ.)
Next, what’s the size and shape of your studio? If it’s a small room (less than 6 by 10 feet), you probably want to avoid it. It will sound too close. When you have such low ceilings, it’s hard to hear the reverb; and when you can’t hear it, then what kind of sound is that? Your voice becomes too loud and aggressive.
If your space is more than 6 by 10 feet but less than 12 by 15 feet in size, you’ll be okay for a home studio (provided your engineer does acoustical treatment). Keep in mind that size doesn’t mean much, though. As long as your room is designed well and has solid engineering, there are no other factors to worry about.
Finally, you should have your studio as dead as possible. I know what you’re thinking: “But I want a super live-sounding recording studio!” Dead rooms sound more natural because they don’t color the music at all. The best types of rooms need to be deadened while still giving you enough reverberation (and not making it too reverby). I’ll talk more about this later on when we talk about how the microphone affects how “alive” your room sounds.
Acoustics aren’t everything, though. You also need a great engineer. If you have both, you’ll be surprised at what you can accomplish.
The Microphone Is Almost as Important as the Room
Doing all of this acoustical engineering is pointless unless you have a good microphone and a solid technique to use it. This is why many new studios are starting to spring up across the country—and why they’re flourishing just as much. A great room and a poor microphone will leave your music sounding like garbage (as will a great room with poor engineering). The right combination of these two factors can completely change your sound and get your music heard by more people!
That said, here’s how I look at microphones. We are not talking about buying the biggest and most expensive ones you can find. Just get one that will do the job. Avoid getting a budget-priced microphone; they’re never worth a dime. Instead, get a mid-priced microphone that will work well in the studio. (I recommend Neumann, AKG, Sennheiser, and Beyerdynamic.) Any microphone is better than no microphone.
Now, on to the part of having a great sound. First of all, NEVER put a dynamic microphone (such as the Shure SM-58) up to your face when you are singing. Dynamic mics are extremely sensitive and are not capable of handling high sound pressure levels (SPLs). When you scream into one and use too much compression at high gain settings, you can literally blow the diaphragm out of the mic.
Instead, use an electret condenser microphone. These mics are so sensitive that their diaphragms are not affected by high SPLs. The result is a more natural, realistic sound. When you’re recording or singing, have the mic on a stand about three to five inches from your mouth. When you’re done with your take, don’t touch the microphone at all and listen to how “real” the sound is (without any processing). If it sounds like you’re screaming into a potato chip bag, then you know there’s something wrong with it and should get another one.
The time to change your mic is when it doesn’t sound right in relation to the room you’re recording in. A good engineer will know what mic to use and can help you get the best sound.
On the other hand, a good engineer should understand basic recording techniques, such as what equalization is, how gain affects the signal, and how to use a compressor set up properly. After all, they’re the ones that will be editing your songs and making them sound good. They don’t want you to screw it up by having an inferior mic or not setting it up properly in the first place!
Written by Joey Miller.
Author at Soundproofing R Us, Audio and soundproofing specialists in London


